Six Inches of Topsoil Isn’t Enough for a Thriving Garden
When I first started gardening, I thought I had it all figured out. My raised beds were perfectly constructed, my irrigation system was dialed in, and I diligently added six inches of beautiful, dark topsoil. Every gardening book and online guide seemed to suggest six to eight inches as the ideal, so I followed it religiously. I imagined lush, vibrant plants bursting with produce, a testament to my meticulous planning. What I got instead was meh.
My carrots were stunted, my tomatoes struggled with blossom end rot despite perfect watering, and my prize-winning zucchini plants were consistently outmaneuvered by weeds. It wasn’t a total failure, but it certainly wasn’t the bountiful paradise I envisioned. I blamed everything from the local weather to rogue squirrels, but the truth, as I eventually discovered, lay much deeper – literally. My assumption that six inches of topsoil was ‘enough’ was holding my entire garden back. It’s one of the most common pieces of advice given, and in my experience, one of the most misleading for anyone serious about growing their own food.
What I learned through years of trial and error, countless soil tests, and a lot of frustrated plant discussions with experienced growers, is that a truly thriving garden doesn’t just need some topsoil; it needs deep, living topsoil that supports robust root systems. Without addressing this fundamental need, you’ll be fighting an uphill battle with nutrient deficiencies, poor water retention, and plants that simply lack the vigor to produce abundant harvests. It’s not about having a perfectly level layer, but about building a dynamic, biodiverse foundation.
Key Takeaways
- Six inches of topsoil provides only shallow root growth, leading to nutrient stress and poor yields for most vegetables.
- Aim for at least 12-18 inches of rich, active soil depth to support robust root systems and improve water and nutrient access.
- Build soil depth over time by incorporating organic matter like compost and aged manure, rather than relying on a single topsoil delivery.
- Regularly assess your soil structure and organic content through simple tests to guide ongoing soil improvement efforts.
The Shallow Root Problem Most Gardeners Overlook
The biggest misconception about six inches of topsoil is that it’s sufficient for almost all common garden vegetables. While some shallow-rooted crops like lettuce or radishes might tolerate it, the vast majority of popular garden plants – tomatoes, corn, peppers, squash, and root vegetables like carrots and potatoes – are deep feeders. These plants develop extensive root systems that can stretch 18 inches, two feet, or even deeper into the soil in search of water and nutrients. When their root growth is constrained by a thin layer of topsoil over compacted subsoil, several issues inevitably arise.
First, nutrient availability becomes severely limited. Plants can only access the nutrients present in their immediate root zone. If that zone is shallow, essential macronutrients like nitrogen, phosphorus, and potassium, along with crucial micronutrients, are quickly depleted. Even if you fertilize regularly, the plant still needs a healthy root system to effectively absorb those nutrients. In my own garden, I saw this manifest as pale leaves, stunted growth, and a susceptibility to pests and diseases that more vigorous plants shrugged off.
Second, water retention and drainage are compromised. A shallow layer of topsoil, especially if it’s new and hasn’t had time to integrate with the underlying soil, acts like a sponge on a brick. It might absorb water quickly, but it also dries out quickly, requiring more frequent irrigation. Conversely, if the subsoil is compacted clay, a shallow topsoil layer can become waterlogged, starving roots of oxygen. I found myself constantly adjusting my watering schedule, trying to find a sweet spot that never quite materialized. Building a deeper, more organic-rich soil column improves both these aspects, acting as a buffer against both drought and excessive moisture.
Third, root vegetables suffer dramatically. Imagine trying to grow a long, straight carrot in just six inches of loose soil. It’s going to hit resistance, fork, or become stunted. My early attempts at carrots were hilariously deformed. It wasn’t until I started actively improving the soil to a depth of 18 inches or more that I began harvesting those long, smooth, perfectly shaped carrots you see in seed catalogs. This isn’t just about root crops; all plants benefit from the freedom to develop strong, unhindered root systems.
Building 12-18 Inches of Rich, Active Soil
My personal threshold for what I now consider ‘enough’ soil is a minimum of 12 inches for most crops, and ideally 18 inches for those heavy feeders and root vegetables. This isn’t just about dumping more topsoil into a raised bed; it’s about building a biologically active, well-structured soil profile. The mistake I see most often, and one I made myself, is treating soil like a static medium rather than a living ecosystem.
What changed everything for me was shifting my focus from merely adding ‘topsoil’ to actively building soil. This means prioritizing organic matter. Think of it less like filling a container and more like baking a cake – you need layers and ingredients that work together. Here’s how I approach it:
- Start with Subsoil Improvement (if not using raised beds): If you’re gardening in-ground, don’t just put topsoil on top of compacted clay or sand. Break up the existing subsoil to a depth of at least 12-18 inches. A broadfork is an invaluable tool for this, as it aerates without inverting the soil layers. This initial loosening is crucial for roots to penetrate deeper.
- Integrate Heavy Organic Matter: This is where the magic happens. Instead of just buying ‘garden soil’ or ‘topsoil’ from a landscape supplier, incorporate substantial amounts of well-aged compost, leaf mold, and aged animal manure directly into the soil. For new beds, I often do a 1:1 ratio of compost to existing soil or a good quality base soil. This isn’t a one-time thing; it’s an ongoing process.
- Layering for Success (especially in raised beds): For raised beds, I employ a lasagna gardening approach. I start with a layer of cardboard (to suppress weeds), then add thicker layers of straw, wood chips (not fresh, but partially decomposed), aged manure, and then top with high-quality compost and a balanced base soil. This decomposition process slowly releases nutrients and creates that deep, active soil profile over time. My most productive beds are those that have been established for several years and have had continuous additions of organic matter.
- Embrace Cover Cropping: During off-seasons, planting cover crops like clover, vetch, or even winter rye can drastically improve soil structure and add organic matter. They protect the soil from erosion, suppress weeds, and when tilled in (or chopped and dropped) before flowering, they release valuable nutrients back into the soil. This has been a game-changer for my garden’s long-term health.
By consistently adding and integrating organic matter, you’re not just making the soil deeper; you’re creating a complex web of microbial life, improving aeration, enhancing water retention, and establishing a slow-release nutrient reservoir that store-bought topsoil alone can’t replicate.
Don’t Just Add Topsoil; Build Soil with Organic Matter
The distinction between merely adding topsoil and actively building soil through organic matter cannot be overstated. Topsoil, as purchased from a supplier, is often just a blend of sand, silt, clay, and some organic material. Its quality can vary wildly, and without ongoing maintenance, it can compact, lose structure, and become less fertile over time. It’s a starting point, not a complete solution.
Organic matter, on the other hand, is the lifeblood of healthy soil. It’s the decomposed plant and animal material that gives soil its dark color, earthy smell, and incredible fertility. Here’s why it’s critical for deep, thriving gardens:
- Improved Structure and Aeration: Organic matter acts like a binder, creating aggregates – small clumps of soil particles. These aggregates create pores that allow water to penetrate easily, air to reach roots, and beneficial microbes to flourish. Without good structure, soil compacts, becoming dense and inhospitable to roots.
- Water Retention: A soil rich in organic matter can hold significantly more water than barren soil. For every 1% increase in organic matter, the soil’s water-holding capacity can increase by up to 25,000 gallons per acre. This means less frequent watering and healthier plants during dry spells. In my experience, once I started focusing on organic matter, I cut my irrigation needs by nearly a third.
- Nutrient Cycling and Release: Organic matter is a slow-release fertilizer. As microbes decompose it, they convert nutrients into forms plants can readily absorb. It also acts as a chelation agent, holding onto nutrients and preventing them from leaching away, making them available to plants over a longer period. This reduces the need for synthetic fertilizers and creates a more stable nutrient supply.
- Habitat for Beneficial Microbes: A tablespoon of healthy soil can contain billions of microorganisms. These bacteria, fungi, nematodes, and other tiny creatures are essential for nutrient cycling, disease suppression, and overall soil health. Organic matter provides the food and habitat they need to thrive, creating a robust underground ecosystem that directly benefits your plants.
My routine now involves a consistent annual top-dressing of beds with an inch or two of high-quality compost, along with incorporating chopped leaves and other garden debris directly into the soil. This continuous input of organic matter is what transforms a merely ‘adequate’ topsoil layer into a dynamic, living soil capable of supporting truly abundant growth.
Assessing Your Current Soil Depth and Quality
Before you start adding massive amounts of new material, it’s crucial to understand what you’re working with. You can’t fix a problem if you don’t accurately diagnose it. My initial mistake was assuming my store-bought topsoil was perfect. Regular assessment is a non-negotiable step in building truly great garden soil.
Here are some simple, practical ways to assess your soil:
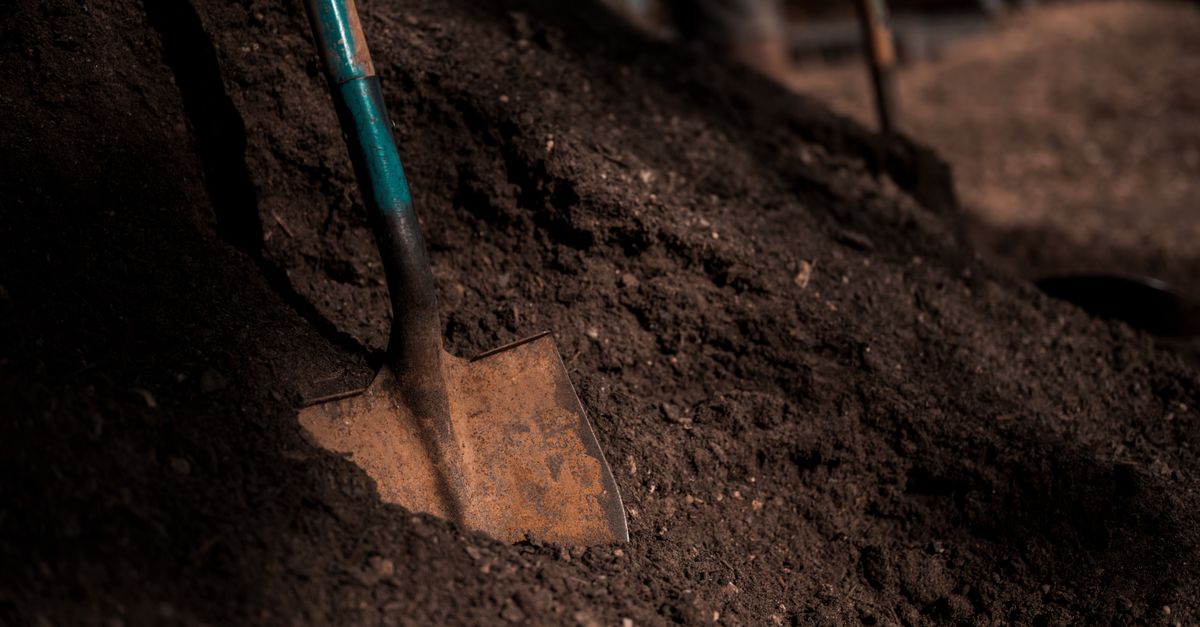
- The Shovel Test (or Post-Hole Digger): This is the most straightforward. Grab a shovel, or even better, a post-hole digger, and dig down. How far can you go before you hit hard, compacted earth, or visibly different subsoil? Look at the cross-section. Is the dark, crumbly topsoil truly six inches, or is it less? Is there a hardpan layer below? What does the subsoil look like – is it dense clay, or loose sand? Ideally, you want to be able to easily dig down 12-18 inches without hitting significant resistance. If you can only go 6-8 inches before encountering dense, unproductive soil, you have your starting point for improvement.
- The Perk Test (for Drainage): Dig a hole about a foot deep and a foot wide. Fill it with water and let it drain completely. Once drained, fill it again and time how long it takes for the water to drain. If it drains within 10-30 minutes, you have good drainage. If it takes several hours or days, you have poor drainage (often due to heavy clay or a hardpan). If it drains in less than 5 minutes, you might have overly sandy soil that struggles with water retention.
- The Squeeze Test (for Texture and Organic Matter): Grab a handful of moist soil from different depths. Squeeze it firmly. If it forms a tight ball that doesn’t easily crumble, you likely have a high clay content. If it crumbles and falls apart immediately, it’s probably sandy. The ideal soil forms a ball that holds its shape but can be easily broken apart with gentle pressure. This indicates a good balance of sand, silt, and clay (loam), enriched with organic matter that gives it that desirable crumbly structure. The darker the color and the more earthy the smell, the higher the organic content.
- Professional Soil Test: While the above tests give you a good visual and tactile sense, a professional soil test from your local extension office (or a reputable lab) provides a detailed report on pH, nutrient levels, and often organic matter content. This is invaluable for guiding specific amendments and ensuring you’re not over-fertilizing or adding unnecessary materials. I do one every three years to keep my soil balanced.
By regularly performing these assessments, you gain an intimate understanding of your soil’s health and can tailor your building efforts to its specific needs. It’s an ongoing dialogue with your garden, not a one-time transaction.
Long-Term Strategies for Deep Soil Enrichment
Building deep, fertile soil isn’t a sprint; it’s a marathon. It’s a continuous process that yields increasing returns year after year. Once you’ve established your initial 12-18 inches of active topsoil, the focus shifts to maintaining and enriching it. These long-term strategies have transformed my garden from merely surviving to truly thriving.
- Composting In-Situ: Beyond adding finished compost, I’ve started practicing in-situ composting. This involves digging small trenches or pockets in the garden beds and burying kitchen scraps, garden waste, and other organic materials directly. This slow, continuous decomposition enriches the soil from within, encouraging worms and microbial activity directly where your plants are growing. It’s a less labor-intensive way to consistently add organic matter.
- Minimum Tillage: While I initially broke up my subsoil, I now practice minimal tillage in my established beds. Excessive tilling disrupts soil structure, destroys fungal networks, and can release stored carbon into the atmosphere. Instead, I use a broadfork to gently aerate the soil once a year, or simply loosen planting areas with a digging fork. This preserves the delicate soil ecosystem that’s been built up.
- Permanent Mulch Layers: Maintaining a permanent layer of organic mulch (shredded leaves, straw, wood chips, untreated grass clippings) on top of your beds is a game-changer. It slowly breaks down, adding organic matter from the top down, just as it would in a forest ecosystem. Mulch also conserves moisture, suppresses weeds, and moderates soil temperature. I aim for a 2-4 inch layer year-round, replenishing it as needed.
- Chop and Drop: Instead of removing spent plant material or prunings from the garden, I chop them into smaller pieces and leave them to decompose directly on the soil surface or incorporate them lightly. This mimics natural processes, returning nutrients and organic matter directly to the soil where they originated. My old habit was to meticulously clean beds, which, in hindsight, was robbing the soil of valuable inputs.
- Diverse Plantings and Crop Rotation: Planting a wide variety of crops, including nitrogen-fixing legumes, helps create a diverse root architecture that improves soil structure at various depths. Practicing crop rotation – moving plant families to different beds each year – prevents the depletion of specific nutrients and reduces the buildup of soil-borne pests and diseases, allowing your soil to remain balanced and healthy.
These strategies, implemented consistently, mean that my garden beds are not just deep, but they are alive – teeming with earthworms, beneficial fungi, and a rich, diverse microbial community. This isn’t just about growing food; it’s about fostering a regenerative system that becomes more productive and resilient over time.
My Experience: From Stunted to Spectacular
The transformation in my garden after embracing these deep soil principles was nothing short of spectacular. My first year, with just six inches of topsoil, my tomatoes were leggy, prone to early blight, and yielded maybe 10-15 small fruits per plant. My carrots were tiny, and my bell peppers never quite reached full size. It was discouraging, and I questioned whether I had a green thumb at all.
After two years of aggressively building my soil to a minimum of 15 inches with compost, aged manure, and cover crops, the difference was astounding. My tomato plants, now with deep root systems, were over six feet tall, resisting blight, and producing hundreds of pounds of fruit. My carrots were long, straight, and sweet, easily plunging a foot into the friable soil. My peppers were enormous, and my squash plants were so vigorous they threatened to take over the entire garden. Nutrient deficiencies became a rarity, and the need for supplemental fertilization drastically decreased.
The most noticeable change wasn’t just in yield, but in the resilience of my plants. During a particularly dry summer, my deeply rooted plants weathered the heat much better than my neighbors’ gardens, which were struggling despite frequent watering. My soil, rich in organic matter, acted as a massive water reservoir. Weeds, though still present, were easier to pull, and their growth seemed less aggressive, overshadowed by the vitality of my crops.
It wasn’t an overnight fix; it was a cumulative effort. But the lesson was profound: the initial investment in building truly deep, living soil pays dividends for years to come. Six inches might get you started, but 12-18 inches (or more) is where a truly bountiful and resilient garden begins to flourish. Don’t settle for ‘enough’; aim for abundance, and build your soil accordingly.
Frequently Asked Questions
How long does it take to build deep, rich soil?
Building truly deep and rich soil is an ongoing process, not a one-time event. You can significantly improve soil depth and quality within 1-2 growing seasons by consistently incorporating large amounts of organic matter like compost, aged manure, and cover crops. However, establishing a mature, highly fertile soil ecosystem can take 3-5 years or even longer.
Can I add too much organic matter to my soil?
While organic matter is crucial, it’s possible to add too much at once, especially if it’s not fully decomposed. Fresh organic matter (like wood chips or fresh manure) can temporarily tie up nitrogen in the soil as microbes break it down, leading to nitrogen deficiency in plants. Always use well-aged compost and manure, and aim for a gradual, consistent addition of organic matter rather than a single massive input. An ideal organic matter content for most garden soils is between 5-10%.
Do I need to remove my old soil before adding new topsoil?
Not necessarily. If your existing soil is compacted subsoil or poor quality, it’s often more beneficial to integrate organic matter into it rather than remove it. If you’re building raised beds, you can layer organic materials directly on top of existing soil, using cardboard as a weed barrier. For in-ground gardens, breaking up existing soil with a broadfork and then mixing in compost is usually the best approach, as it integrates the new material with the old, fostering a deeper, more continuous soil profile.
What are the best organic materials to use for soil building?
High-quality, well-aged compost is the cornerstone of soil building. Other excellent materials include aged animal manure (from cows, horses, chickens), leaf mold (decomposed leaves), worm castings, and finely shredded straw or wood chips (used as mulch or lightly incorporated). Green manures (cover crops) are also fantastic for adding organic matter and nutrients directly in situ.
How often should I test my soil?
For a new garden or if you’re undertaking a significant soil improvement project, it’s a good idea to get a professional soil test annually for the first 2-3 years. Once your soil is established and healthy, testing every 2-3 years is usually sufficient to monitor pH, nutrient levels, and organic matter content, and to guide any necessary amendments. Regular visual and tactile assessments (like the squeeze test) can be done more frequently.
In my own experience, once I started treating my garden soil as a dynamic, living entity that needed consistent care and deepening, my yields and plant health dramatically improved. Don’t let the ‘six inches is enough’ myth hold your garden back. Invest in building deep, biologically rich soil, and you’ll be rewarded with a bountiful harvest for years to come.
Written by Marcus Chen
Wellness & Relationships
With a background in community development, Marcus is adept at uncovering practical strategies for well-being and social connection.
You Might Also Like

A Practical Checklist for Choosing a Travel Backpack That Delivers Real Comfort and Durability
Don't settle for a travel backpack that causes pain or falls apart. This checklist helps you pick one for true comfort and lasting durability.

A Practical Checklist for Picking the Right Car Detailing Service
Don't waste money on subpar car detailing. Use this expert checklist to find a service that truly restores and protects your vehicle's finish, based on my experience.

Why Most Budget Home Security Systems Disappoint and Overlook Real Protection
Discover why relying on budget home security systems often leads to false peace of mind and what truly builds layered, effective protection.